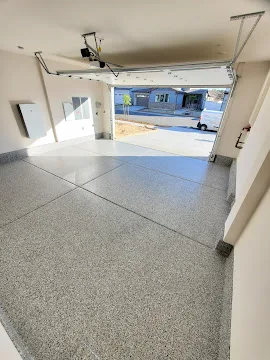
You’re standing in the garage looking at a curled-up edge of coating near the door, or a chip you kicked loose is sitting on the floor with the underside facing up. Before you decide whether this is a five-minute touch-up or something bigger, it helps to know what you’re actually looking at. Epoxy doesn’t fail in just one way, and the way it’s failing tells you a lot about what has to happen next.
Three things people call “peeling”
Homeowners use “peeling” for three different problems that don’t share the same cause.
Sheet delamination is the coating separating from the concrete in large, connected pieces. You can slide a putty knife under an edge and lift a section the size of a dinner plate or bigger. This is almost always a bond failure between the coating and whatever is underneath it.
Edge and seam curling shows up at transitions: along a floor drain, at the garage door threshold, where two pours meet, or at the base of a wall. The coating lifts at that one line while the rest of the field still looks fine. Edges are where a coating has the least material holding it down, so they’re often the first place a marginal bond gives up.
Surface flaking is smaller chips breaking off, often from impact: a dropped tool, a car jack, a dragged appliance. This can happen even on a well-bonded floor, because it’s a toughness problem in the film itself, not necessarily an adhesion problem underneath it. Flaking from impact and true delamination can look similar from a few feet away but point to different fixes.
Knowing which of these three you have narrows the list of causes before you even look closer.
The five-second test: flip the chip over
If you have an actual piece of coating that came off, not just a lifted edge you can peek under, turn it over and look at the back.
If the back of the chip is smooth, clean concrete-colored plastic with no concrete stuck to it, the coating separated cleanly at the interface between itself and the slab. That’s an adhesion failure: something prevented the epoxy from mechanically gripping the concrete in the first place, or something got between them. The concrete underneath is fine. The bond never happened.
If the back of the chip has a layer of gray concrete dust or a thin skin of weak material still stuck to it, the coating pulled a piece of the slab’s surface off with it. That means the bond between epoxy and concrete was actually stronger than the top layer of the concrete itself. The failure happened inside the concrete, not at the interface. This is usually a sign of laitance (a weak, dusty cement-rich layer left on the surface from finishing) or a low-strength, powdery top layer that was never sound enough to hold anything.
That distinction changes the fix. An adhesion failure means the surface prep has to be redone correctly the next time: profile, cleaning, primer. A substrate failure means the weak layer of concrete itself has to be ground away until sound material is reached, regardless of how good the next coating is. Recoating over the same weak surface, even with a better product, sets up the same failure again.
What’s going wrong, ranked
In roughly the order these show up on real jobs:
- No real mechanical profile. Epoxy needs a roughened, open surface to grip. Acid etching is inconsistent, leaves salts behind, and doesn’t reliably reach a usable profile. It isn’t a substitute for mechanical grinding or blasting. A slick or barely-scuffed slab gives the coating almost nothing to hold onto.
- Curing compound or old sealer never removed. New concrete often gets sprayed with a curing compound to control water loss while it hardens. It can be nearly invisible once dry, but it sits directly on top of the pores the epoxy needs to reach. Old acrylic sealer does the same thing on existing driveways and floors.
- Moisture moving up through the slab. Concrete without a vapor retarder underneath it, or concrete over damp soil, can pass water vapor upward for years. You won’t see it on installation day. It undermines the bond gradually, sometimes not showing up as a visible problem for months.
- Hot-tire pickup. A car that sits with hot tires from a summer drive, then turns its wheels while parked, can grab and lift a coating that isn’t built to handle that shear stress, especially on thinner systems.
- Big-box kit thickness. Retail epoxy kits are formulated and priced to cover a specific area at a specific thickness. Spreading that same kit over a two-car garage stretches the film thinner than the product was designed for, which leaves less material to resist wear, moisture, and hot tires.
- Wrong mix ratio. Two-part epoxy cures through a chemical reaction between resin and hardener, not by drying. Get the ratio wrong, or don’t mix long enough to combine the material sitting against the bucket wall, and you get a film that stays soft, stays tacky, or cures brittle. Any of those fails early.
- Missed recoat window. Every epoxy system has a window between coats where the next layer can chemically bond to the one before it. Recoat too early and you trap solvent or moisture under the new layer. Recoat too late and the surface has already cured past the point of chemical bonding. The new coat just sits on top mechanically, and it can lift as a whole layer later. This same thin-film math is a big part of why choosing the right garage floor system for a space matters as much as fixing one that’s already failing.
Bubbles, blisters, and fisheyes are not the same defect
These three get lumped together because they all look like something is “wrong under the surface,” but they come from different places.
Small bubbles at installation usually show up during or right after the pour: tiny air pockets from roller entrainment, mixing too aggressively, applying too thick a coat, or gases escaping a porous, unprimed slab as the epoxy skins over. These are mostly a workmanship and technique issue, and a careful installer controls for them with the right roller, mix speed, and primer.
Blisters that appear weeks or months later are a different animal. These are usually moisture-driven: vapor pressure or osmosis pushing up from underneath the cured film, sometimes with actual contamination involved. They tend to show up gradually, in specific areas rather than the whole floor at once.
Fisheyes and small craters come from surface contamination that resisted the wet coating as it was applied: silicone from a spray lubricant, wax, tire dressing tracked in on a shoe, or aerosol overspray drifting in from a nearby project. These form during application, not later, and they point to a contamination problem, not a moisture or profile problem.
If a blister is full of liquid, don’t sand it
This is worth saying directly: if you press on a raised spot and it feels soft or gives, or you can see it’s a pocket holding liquid, do not sand it flat and patch over it. A liquid-filled blister is moisture doing exactly what moisture does, finding the weakest point and pushing. Sanding it down treats the visible symptom and leaves the actual water source untouched. It will very often come back, sometimes in the same spot and sometimes nearby.
The right next step is investigating the moisture itself, not the blister. There are a few ways to measure slab moisture, and they aren’t interchangeable. In-situ relative humidity probes, tested to a standardized depth per ASTM F2170, give the most reliable picture of what’s happening inside the slab. A handheld moisture meter is useful for quickly scanning a floor and comparing wetter and drier areas relative to each other, but it’s a screening tool, not a pass/fail test on its own. There’s no single humidity number that applies to every coating. The acceptable limit is set by the specific product’s manufacturer, not by a rule of thumb that works everywhere.
How a professional confirms the cause
Looking at a chip and guessing gets you close, but there’s an actual test for this. ASTM D7234 describes a pull-off adhesion test: a small metal disc (a “dolly”) gets bonded to the coating surface with a high-strength adhesive, a portable tester pulls straight up on it with increasing force, and the equipment records exactly how much force it took to separate something.
The number matters less than what separated and where. If the break happens cleanly at the concrete-to-coating interface, that confirms an adhesion failure. If the break happens inside the concrete itself, pulling a plug of weak concrete up with the dolly, that confirms a substrate problem. Even a high force reading can still mean the concrete failed, not the coating. Occasionally the break happens inside the test adhesive itself, which just means the test needs to be redone. This is the difference between guessing at a cause and actually knowing one, and it’s the kind of test that gets used when the stakes are high enough to be worth confirming rather than assuming.
Can a peeling epoxy floor be spot-repaired?
Sometimes, but it’s worth being honest about the limits before you count on it. A spot repair can work when the affected area is small and isolated, and when the rest of the floor has been checked and doesn’t show the same underlying problem: no widespread moisture signal, no laitance elsewhere, no sign the whole floor was undercut the same way.
What a spot repair usually can’t do is disappear. Matching the sheen, color, and texture of a patch to epoxy that’s been curing and wearing for months or years is difficult even for an experienced installer, and it gets harder with metallic or flake systems where the pattern itself is nearly impossible to reproduce exactly. The seam edge between old and new material is often still visible up close, even when the color is close. If a flawless, invisible match matters to you as much as function does, that’s a real tradeoff to weigh, and it isn’t something a patch reliably delivers. For a full assessment of whether a section of your floor is a good candidate for spot repair, an epoxy flooring evaluation is the way to find out rather than guess.
When full removal and recoat is the honest answer
A patch relocates a problem instead of solving it when the underlying cause is still active across more of the floor than the one visible spot. If the chip test shows concrete attached to the back, meaning the substrate itself gave way, that weak layer likely isn’t confined to the one area you can see. If a moisture check finds a meaningful reading, that’s a slab-wide condition, not a local one, and a patch over one blister does nothing about the next one forming six feet away.
In those situations, the honest answer is that the existing coating needs to come off the whole floor, not just the failed section, so the surface can be corrected properly and treated as one system again. It’s not the answer anyone wants to hear standing over a floor they already paid to have coated once, but recoating over an unresolved cause just buys a shorter amount of time before the same failure shows up again.
What a proper re-do involves
If a full removal and recoat is where you land, here’s what that process should include, not just sanding it down and putting epoxy back on top:
Grinding the entire floor, not just the failed section, to remove the old coating and cut a real mechanical profile into the concrete, deep enough to reach past any weak or laitance layer if that’s what caused the original failure. Repairing cracks and spalls before anything else goes down, since a coating applied over an untreated crack just telegraphs that crack back through. Testing the slab’s moisture condition using a method appropriate to what’s been found so far, rather than skipping straight to product application. Selecting a primer suited to the actual porosity and moisture situation of that specific slab. Mixing the epoxy correctly: full ratio, full mechanical mix time, transferred to a clean container so nothing unmixed against the original bucket wall gets left behind. Tracking film thickness as it’s applied, not eyeballing it, so the coating ends up built to the thickness the product was designed for. Checking slab temperature, air temperature, humidity, and dew point before application, since installing on the wrong day undoes good prep work. And a return-to-service schedule that separates when it’s safe to walk on, when furniture can go back, and when a vehicle can actually park on it. Those are different dates, not one blanket “dry” milestone. This is the full epoxy flooring process, done as one sequence rather than skipped steps stacked on top of an old problem.
Orange County conditions that make this worse
Two local conditions show up often enough to be worth naming specifically. Coastal mornings bring a marine layer that can leave a slab’s surface below the dew point without looking wet at all. Condensation can be happening at a microscopic level on a floor that looks bone dry, and that’s enough to compromise a bond before the coating ever goes down. Further inland, summer sun heats the slab itself far past the air temperature around it; a floor can be well into the 90s or higher while the thermometer on the wall reads something milder, and that heat shortens working time, speeds up cure, and increases the odds of pinholes and lap lines from material that’s setting up faster than it can be spread and rolled out evenly. Neither of these is a reason to avoid installing epoxy here. They’re reasons the timing and site conditions on install day matter as much as the product itself.
What to do next
Put the pieces together and you usually already know roughly which direction you’re in. A clean-backed chip, an isolated spot, no liquid blister, and a floor that otherwise looks sound points toward a limited, honest repair being realistic. Concrete stuck to the back of the chip, a liquid-filled blister, or peeling showing up in more than one unrelated area points toward a slab-wide condition that a patch won’t resolve.
If you want a straight answer on which one you’re actually dealing with rather than guessing from a blog post, that’s exactly what an in-person look at your epoxy flooring is for. Call or text a photo of what you’re seeing and we can tell you what we’re looking at before anything gets scheduled.